Make Your MIDI Sound Human: The Magic of Velocity
Share
If you’ve ever programmed MIDI chords or melodies, you’ve probably run into this problem: everything sounds too perfect. Each note is the same volume, the timing is spot-on, and the result feels… robotic. While precision is great for certain styles, it often strips away the natural dynamics that make real performances feel alive.
That’s where MIDI velocity comes in.
What Is MIDI Velocity?
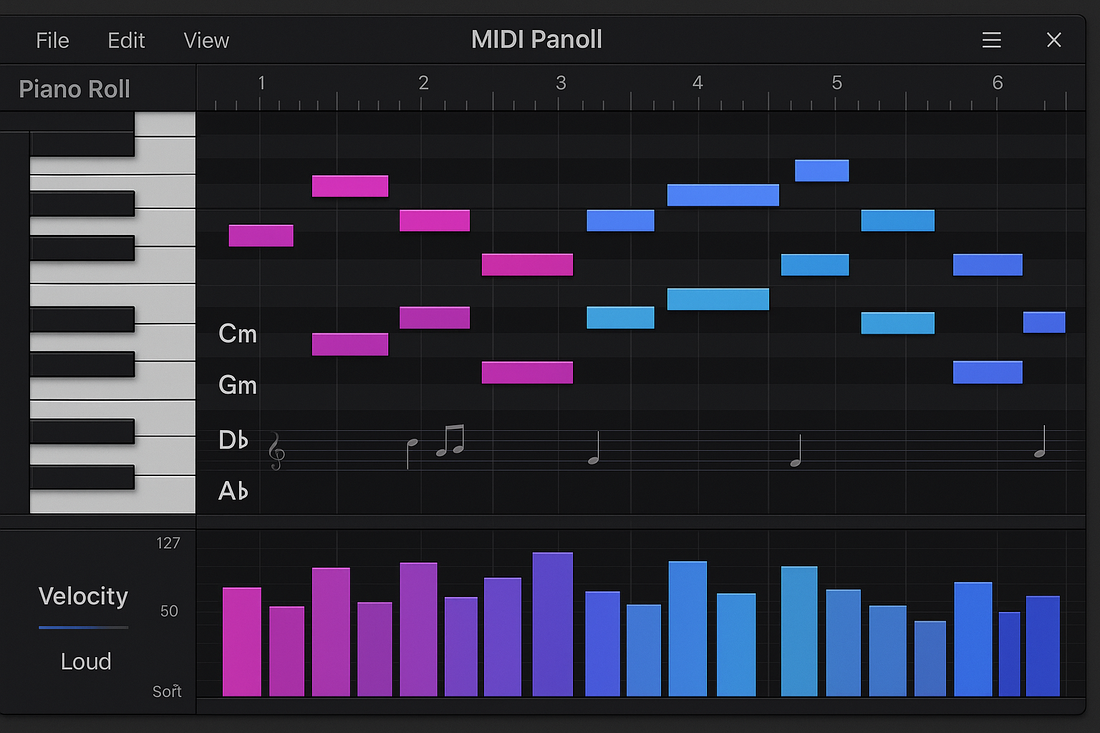
In simple terms, velocity measures how hard a note is played. Every MIDI note has a velocity value between 0–127:
- Higher velocity = a louder, stronger, more aggressive note.
- Lower velocity = a softer, quieter, more delicate note.
But velocity isn’t only about volume. Many virtual instruments respond to velocity in more complex ways, changing tone, attack, resonance, or articulation depending on how hard the note is played. For example, a piano plugin might sound bright and sharp at high velocities but warm and mellow at lower ones.
Why Velocity Makes MIDI Feel Human
Think about a live performance. A guitarist doesn’t strum every string with identical force. A pianist doesn’t press each key with the exact same touch. Even the most skilled musicians introduce tiny variations in timing, intensity, and emphasis—and that’s exactly what makes their playing expressive.
When your MIDI notes all share the same velocity, you lose this natural variation. Adding subtle differences makes a huge impact:
- Dynamic expression – Softer notes add contrast, so louder notes stand out more.
- Natural rhythm – Tiny velocity changes mimic the inconsistencies of real players, breaking up rigid patterns.
- Emotional depth – A part that rises and falls in intensity feels alive and communicates more emotion.
Tips for Humanizing MIDI with Velocity
Here are a few ways to use velocity to add realism to your tracks:
- Vary chord notes – Don’t let every note in a chord hit at 100%. Make the root note slightly louder and the higher notes a little softer.
- Accent important notes – In a melody, give more weight to the main notes and reduce velocity on passing tones.
- Add randomness – Many DAWs offer “humanize” or “randomize velocity” tools. Even a ±5–10% variation can make a huge difference.
- Explore velocity layers – Some virtual instruments change samples or timbres at different velocity ranges. Use this to unlock new textures and dynamics.
MPC One+ Tips for Velocity
If you’re working on an MPC One+, you don’t have a built-in “randomize” button like in some DAWs, but you can still humanize your MIDI with these tricks:
- Q-Links for velocity – Use the Q-Link knobs to quickly adjust note velocities in Grid Edit. This lets you create variation without editing each note by hand.
- Shift timing slightly – In Timing Correct (TC), experiment with Shift Timing to move notes a little off-grid. Combined with velocity changes, this instantly feels more human.
- Real-time velocity – When playing pads, how hard you hit them already controls velocity. Try recording chords or melodies with a lighter touch for natural dynamics.
- Step Sequencer edits – In Step Sequencer, tweak each note’s velocity one by one. It’s slower but gives you precise control for detailed strums or grooves.
Final Thoughts
Velocity might look like just another number in your piano roll, but it’s one of the most powerful tools for transforming mechanical MIDI into expressive, human-sounding music. By making small adjustments to note intensity, you can breathe life into your tracks—adding groove, emotion, and realism.
On the MPC One+, it’s all about using Q-Links, pad dynamics, and subtle nudging in Grid Edit. With just a few minutes of velocity tweaking, your sequences will feel less like a machine and more like a real performance.
So next time you’re programming MIDI, don’t leave all your notes at the same value. Play with velocity, let your chords and melodies breathe, and you’ll instantly notice your music feeling more alive.